Category Archives: Bread

Baking Plans And A Couple Of Loaves

I’ve been trying to work out how I can make more bread. I love making it and trying new recipes, but there are only two of us in this house & we can only eat so much! Of course I can give bread to family/friends, but I still want something more regular to work on. So I’ve been debating getting some part time work in a bakery or selling some loaves, which would be amazing because I could try more loaves, learn more and hopefully make some money at the same time. Wins all round I think.

hornbeam-meeting-01 hornbeam-meeting-02 hornbeam-meeting-06

I was on the Real Bread Campaign website (which I frequent) and spotted an advert from a local cafe looking for home bakers to help them supply bread to their market stalls. I had heard of the Hornbeam Cafe in Walthamstow, but I’ll admit I didn’t know a lot about it. It turns out that all of their bread is provided by the Hornbeam Bakers Collective, which is made up of a group of keen local bakers. They also provide bread to three market stalls on a Saturday, one outside the Walthamstow cafe, one in Leyton and one in Stoke Newington.

hornbeam-meeting-03 hornbeam-meeting-04

Last week I went and met with Pilar from the collective and took her a couple of my loaves to try, a mixed white & wholemeal loaf made with tea (top) and a 50% spelt loaf (above). It was the first time I’d made the 50% spelt, so it wasn’t perfect but I was really please with the mixed grain loaf. Thankfully they both went down a storm, so from this Saturday I will start to provide bread to the stalls. Just 8 loaves at first as I only have a little oven, but if it goes well then who knows where it will lead…

Fresh Bread In Time For Lunch

Last night I mixed up a couple of 60% white flour, 22% spelt flour & 18% wholemeal flour sourdough loaves following Dan Lepard’s recipe for the mill loaf. After 4 hours fermenting with periodic stretching and folding, I shaped them just before I went to bed and left them in the fridge overnight to proof. Then this morning, while getting on with various chores I baked them for 50 minutes each and by lunchtime I had fresh homemade bread to enjoy.

sd-mill-loaf-lunch-01

As I took the loaves out of the oven they were making cracking and popping sounds, which was rather worrying, but after a quick google I discovered that this is a good thing. The loaves were ‘singing’ to me, the sign of a well baked loaf apparently.

sd-mill-loaf-lunch-02

Upon cutting these open I discovered a really soft, spongy crumb with lots of holes. I think the spelt had a real impact on the smoothness on the crumb, and it tastes divine. Just a little nutty from the wholemeal flour and rye starter but otherwise a light texture with a delicately sour flavour. I think these might be my favourite loaves to date.

sd-mill-loaf-lunch-03

As I had this beautiful fresh bread to use, for lunch I made my perfect fried egg sandwich. Fresh sourdough bread smeared with butter, a sliver of mature cheddar cheese and pile of crisp lettuce topped with a juicy fried egg. A decadent lunch that’s hard to beat.

Sourdough Successes

I realised that after documenting my struggles with learning how to make sourdough bread, I never got round to blogging my successes!

White Leaven Bread

sd-success-white-01

sd-success-white-02

sd-success-white-03

I finally got Dan Lepard’s White Leaven Bread recipe to work after repeated disasterous attempts. I was already placing a baking sheet in the oven to get hot and sliding the dough onto it, but this time I added a cloche in the form of an enormous saucepan, upturned on the baking tray. I baked the loaf under the cloche for 30 minutes, enough time for the steam to work it’s magic and then removed the cloche & baking sheet to finish the loaf on the wire oven shelf for the last 20 minutes. The result was a beautifully risen, light and airy white loaf.

The Mill Loaf

sd-success-mill-01

sd-success-mill-02

sd-success-mill-03

As I felt like I’d finally conquered that recipe, I turned the page and attempted the second recipe in Dan’s The Handmade Loaf, The Mill Loaf. This is a 60% white flour & 40% wholegrain flour sourdough loaf. The recipe makes two much larger loaves than the White Leaven Bread recipe and shaped as batons rather than balls and because of this I couldn’t fit them under my makeshift cloche which left me expecting disaster. I needn’t have worried. Both loaves came out beautifully. The first I baked seam side up and it split spectacularly, the second I slashed and baked, it split a little on the bottom seam and opened up at the top slashes. Interestingly while everyone in the online sourdough world loves enormous rips  and ears on their loaves,  all the non-bakers I showed the pictures to thought the slashed version looked more professional.

sd-success-mill-04 sd-success-mill-05 sd-success-mill-06

I much prefer wholemeal bread so for me this bread wins over the white loaf as it’s much more flavoursome. I will definitely make this again and I’m looking forward to experimenting with different flours to see what happens.

Sour 100% Rye Bread

sd-success-rye-01 sd-success-rye-02 sd-success-rye-03

Then this week I moved on to the third recipe in The Handmade Loaf the 100% Rye loaf. My shaping needs work, hopefully I’ll learn some shaping skills on the E5 Bakehouse sourdough bread course next month. The result was a dense and moist loaf with that rich, nutty rye flavour. I loved the feel of this dough too, it was very sticky and springy. I left this loaf wrapped in greaseproof paper & tied up with string overnight as instructed and cut into it for lunch today. I topped slices with pesto, soft cheese, ground black pepper, lettuce & cherry tomatoes for a simple, refreshing lunch. These classic flavours worked with the dense, nutty bread perfectly.

sd-success-rye-04

Guinness Chocolate Chip Sourdough Hot Cross Buns

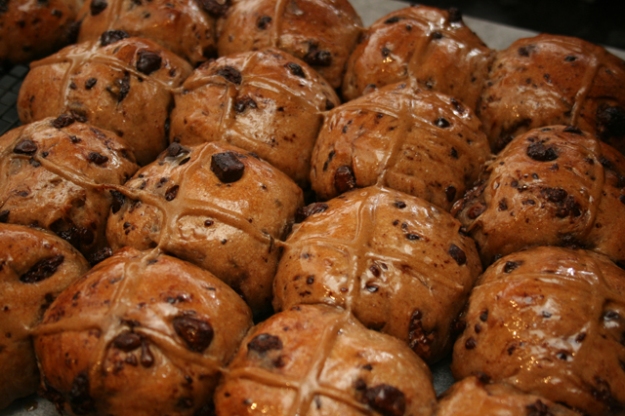
The flavour combination I am completely obsessed with is back, this time in hot cross bun form. Sourdough hot cross buns obviously. These are not your traditional hot cross buns, in fact if you like a traditional spicy, fruity hot cross bun then these are not for you! These hot cross buns are for those of us who like the idea of a hot cross bun, but then take an hour to eat it because we have to pick out all of the dried fruit as we go. I used to be that person, then I made spiced stout hot cross buns and my mind was changed. If you like a traditional hot cross bun, those are the buns for you.

sourdough-gc-hcb-02

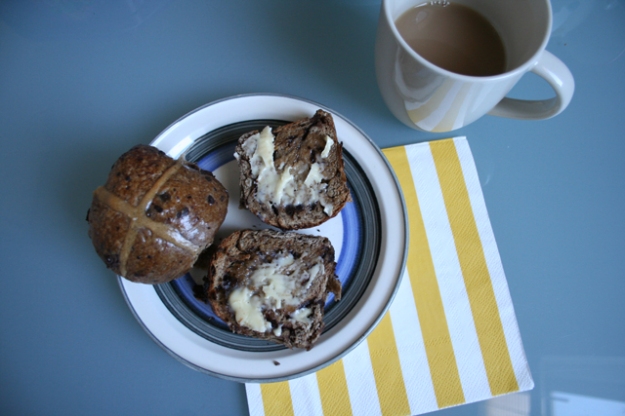
Instead these hot cross buns harness the richness of Guinness to flavour a soft, dense dough containing lots and lots of dark chocolate chips that melt when toasted and mingle with the melting butter that you will smear across it to create the most decadent breakfast I’ve had in a while. But I’m in training, so I’ve been living off porridge for longer than I dare to remember. I can’t wait to get back into proper Sunday morning breakfasts.

sourdough-gc-hcb-03

You could of course use any kind of stout and another type of chocolate, but Guinness and dark chocolate are particularly strong together. In total these took me a day and a half to make, but you can follow the timings for the spiced stout sourdough hot cross buns if you want to make them in a day (plus overnight leaven creation). I know we’re only really supposed to eat hot cross buns on Good Friday, but as these aren’t traditional hot cross buns I think I’ll be untraditional and carry on eating them for a few more weeks!

sourdough-gc-hcb-04

Guinness Chocolate Chip Sourdough Hot Cross Buns

Makes about 16 buns.
Adapted from Dan Lepard’s Spiced Stout Buns recipe.

Ingredients

325ml Guinness (or another brand of stout if you must)
100g sourdough starter
2 teaspoons cinnamon
2 teaspoons allspice
800g strong white flour + a couple of tablespoons extra for the crosses
1 1/2 teaspoons salt
50g caster sugar + 1 tablespoon extra for the glaze
1 large egg
50g melted butter
200g dark chocolate, chopped into chips

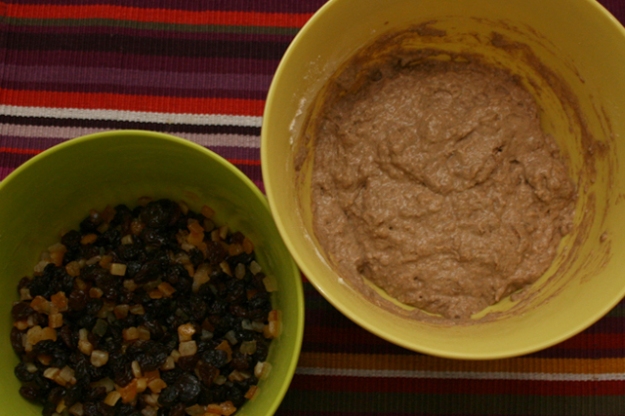
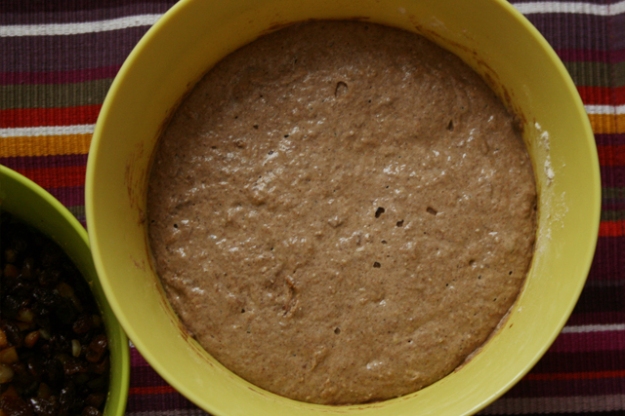
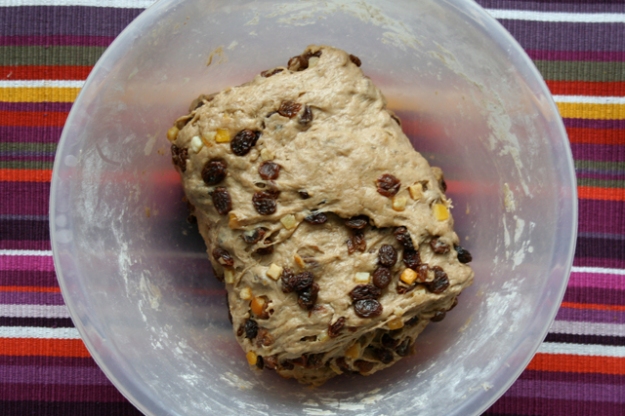
In the morning, whisk together the Guinness & the sourdough starter in a large bowl and stir in the spices and 250g of the strong white flour. Cover with cling film and leave to ferment for at least 6 hours.

That afternoon, mix the remaining 550g of strong white flour with the salt and caster sugar in a large bowl. Mix in the Guinness batter, egg and melted butter until you have a shaggy mess of a dough. Note added: If the batter is struggling to absorb all the flour, then add a little extra Guinness, a tablespoon at a time until it’s all mixed in. Leave for 10 minutes, I took this time to chop up my chocolate as I’m never very good at preparing things like that before I start. Add the chocolate chips to the bowl and stretch & kneed the dough until the chocolate chips are fully incorporated, cover with clingfilm or a clean, damp tea towel and leave to rest.

After 30 minutes, stretch or kneed the dough for 10 seconds or so, then cover and leave to rest again. After a second 30 minutes take the dough out of the bowl, stretch it out to a rectangle then fold the right third to the centre and then the same with the left third, turn the dough 90 degrees and repeat (check out this video for a visual aid, but don’t panic when your dough takes a lot more effort to stretch). Return it to the bowl for another rest. 60 minutes later, repeat the folding technique and return to the bowl for a final 2 hour rest.

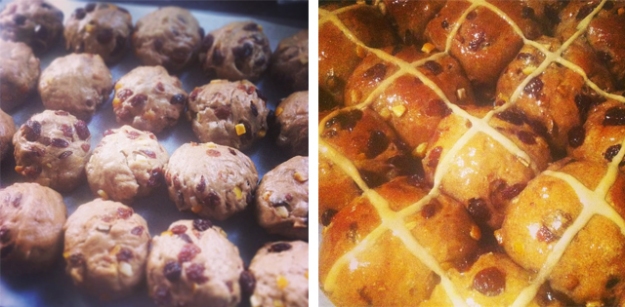
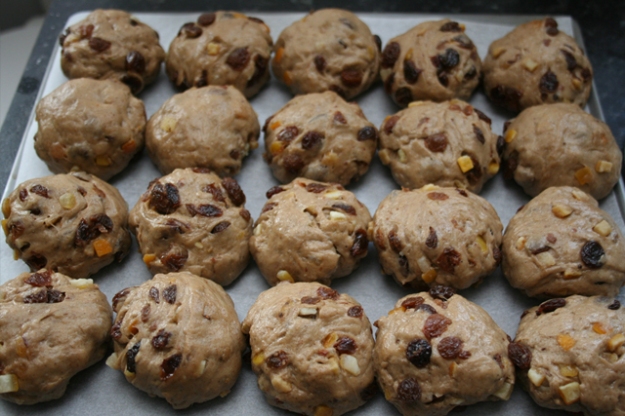
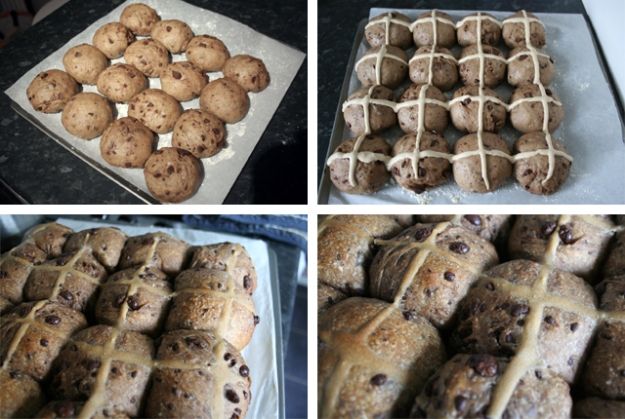
By now we’re well into the evening, perhaps even nearing bedtime, so line a baking tray with baking paper and clear a shelf in your fridge. Divide the dough up into 100g lumps, roll them into balls and place them on the baking tray. They should be touching, but only just. Cover with clingfilm (lightly greased with a little vegetable oil to avoid sticking) or your damp tea towel and place in the fridge overnight.

When you bake them the next day is up to you. I intended to get up and bake them first thing, but in the end I didn’t have time until the afternoon. The buns will be fine in the fridge for most of the day unless you have a particularly vigorous starter. Take them out of the fridge 30-60 minutes before you plan on baking them and preheat the oven to 200C/180C fan.

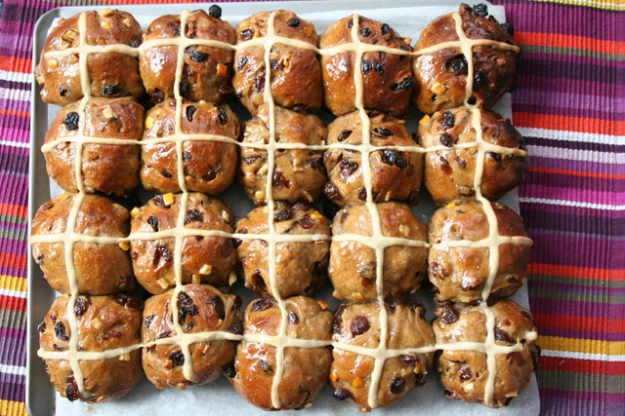
Mix a little flour & water into a paste. Initially add a tablespoon of each then add flour/water a teaspoon at a time until you get the consistency you like. Spoon this into a piping bag & pipe long lines across the rows of buns to create crosses. Go slowly to ensure the batter follows the undulations of the buns & creates even crosses. Put the buns into the preheated oven & place an oven dish with a cup of boiling water at the bottom of the oven to create steam. Bake for 25 minutes.

Take the buns out of the oven and dance round the kitchen to celebrate how great they look. Then, while they are still warm, mix a tablespoon of boiling water and a tablespoon of caster sugar together to form a syrup. Brush this over the buns, making sure you get in all the dips and cracks and between any lumps and bumps from the chocolate chips. It’s worth the effort.

Slide the baking paper with the buns still attached onto a wire rack to cool. The sooner you take them off the paper the better, but you need to let them cool down enough to handle as you’ll probably need to break them into individual buns to do so.

sourdough-gc-hcb-01

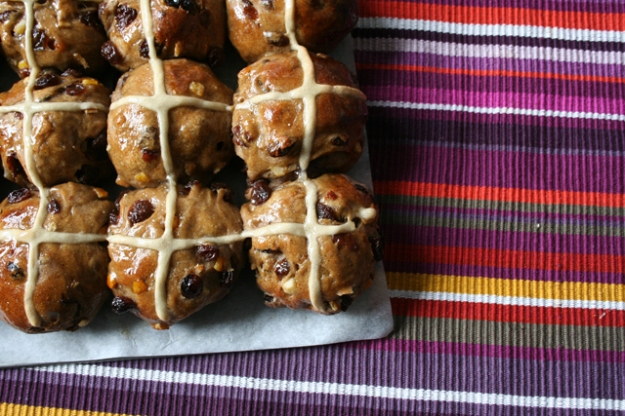
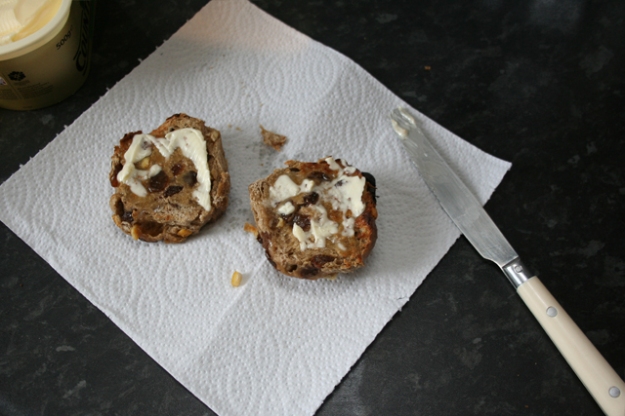
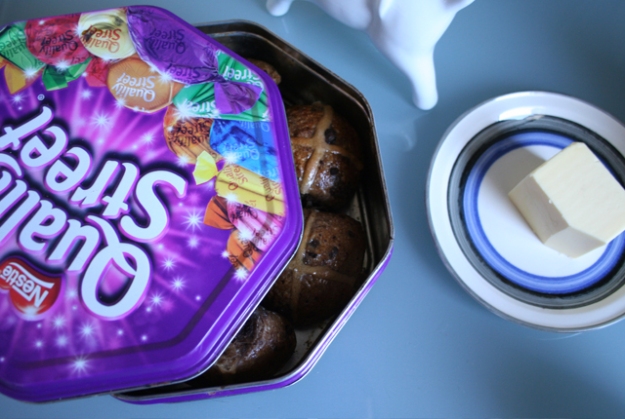
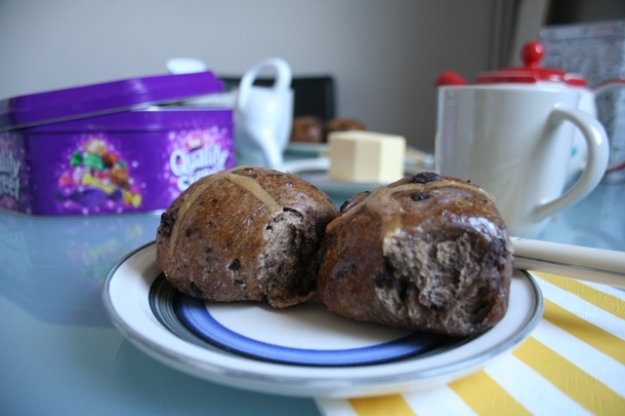
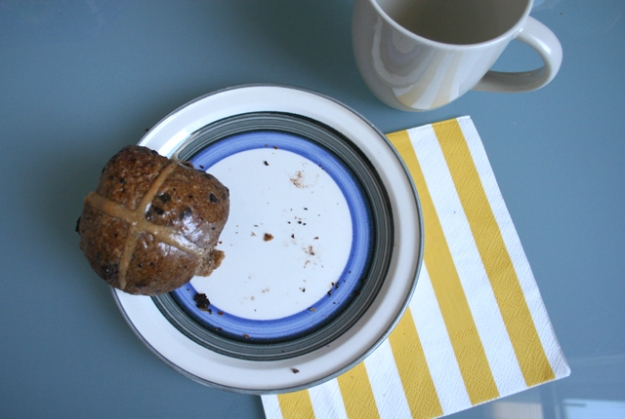
To enjoy: Choose the biggest bun, cut it in half, lightly toast it and smear it with a large quantity of butter. Follow with the tea/coffee of your choice.

sourdough-gc-hcb-05

Time for round two…

Spiced Stout Sourdough Hot Cross Buns

It is the season for hot cross buns and as the season is short we must make the most of it! My current sourdough obsession meant that making a sourdough hot cross bun was a no-brainer, it had to be attempted. After trawling through all my books and my usual internet haunts I settled on Dan Lepard’s spiced stout hot cross buns as my base recipe to adapt.

I ended up using Guinness as it was the only stout available in the miserable little supermarket I visited, but as Guinness is always delicious when combined with sugar I didn’t complain too heartily. The recipe isn’t complicated, but like all sourdough recipes it takes time for the dough to proof, so all in all they took about 24 hours to make. I made my Guinness levain and soaked the fruit overnight, then did the mixing, folding & resting during the morning, left it to proof for the afternoon under a tea towel and then baked in the evening. Another option would be to mix the levain & soaked fruit in the morning, mix the dough, fold it and rest it throughout the evening then proof the buns overnight in the fridge and bake first thing. In fact, I might use that method next time!

sourdough-spiced-stout-hcb-06

The resulting buns were dense and moist with a richly, spiced flavour. The kitchen smelled like Christmas after baking them, it was divine! I sold them at work to raise money for my marathon running efforts and they got thumbs up all round. If you’re not a hot cross bun convert yet, make these, toast them, smear them with butter and you’ll never look back!

I realised after making these that the Twelve Loaves challenge for March is holiday bread! What an ideal coincidence, so I’ve submitted my recipe to the collection on Cake Duchess’ blog. Do check out the other submissions too.

Spiced Stout Sourdough Hot Cross Buns

Makes about 20 buns.
Based on Dan Lepard’s Spiced Stout Buns recipe.

Ingredients

325ml Guinness (or another brand of stout)
150g sourdough starter
1 1/2 tsp ginger
1 1/2 tsp cinnamon
1 1/2 tsp allspice
800g strong white flour
325g raisins
175g mixed peel
200ml hot black tea
1 large egg
50g melted butter
50g caster sugar
1 1/2 tsp salt
(plus a little plain flour & extra caster sugar for the crosses & the glaze)

sourdough-spiced-stout-hcb-01

The night before, whisk together the Guinness & the sourdough starter in a large bowl and stir in spices and 250g of the strong white flour. In a separate bowl mix the raisins, mixed peel and the hot black tea. Cover and leave overnight, in the morning the batter will have swollen like so:

sourdough-spiced-stout-hcb-02

The next day, mix the egg and melted butter through the plumped up fruit, then stir into the spiced beer batter. Mix in the flour, sugar and salt and leave to rest for 10 minutes. Stretch the dough and leave at room temperature for 30 mins, covered with a clean tea towel. Stretch the dough again and leave for another 30 minutes. Take the dough out of the bowl to fold, then return it to the bowl & leave it for an hour. Fold the dough again and leave once more for around 2 hours. Now we can shape the dough.

sourdough-spiced-stout-hcb-03

sourdough-spiced-stout-hcb-04

Weigh out roughly 100g balls of dough. Roll them in your hands then pinch them into a rough boule shape. Place them on a baking tray lined with baking parchment so that each bun is just touching. I easily fit all 20 buns on one baking sheet. Leave these at room temperature, covered with a tea towel, for 3-4 hours until fully risen.

sourdough-spiced-stout-hcb-05

Once the buns look like they’re nearly ready, heat the oven to 180C fan. Mix a little plain flour with a little water to form a paste. The consistency needs to be soft enough to pipe, but not so runny it’s going to dribble out of the nozzle as you spoon it into the piping bag. Pipe crosses across the hot cross buns in continuous lines from one side of the baking sheet to the other. Bake these for 25 minutes until golden.

sourdough-spiced-stout-hcb-07

As they come out the oven, mix a tablespoon of caster sugar & a tablespoon of boiling water and brush over the buns while they’re still hot to give that traditional shiny glaze. Once cool break them apart, cut in half, toast, smear with butter and enjoy…

sourdough-spiced-stout-hcb-08

sourdough-spiced-stout-hcb-09

Sourdough Surprises : Sourdough Pita Breads

While I’ve been enthusiastically experimenting with my sourdough to make bread, I’d not even considered other applications for it. Thought I’d take this sourdough thing one step at a time rather than going in all guns blazing, for once. Then last month I discovered the Sourdough Surprises blog and a whole world of sourdough possibilities was opened up to me!

This month the challenge was for flatbreads and after a flick through Dan Lepard‘s Short & Sweet I decided to keep it simple & try adapting his Perfect Plain Pitas recipe. Dan explains that once you’ve made your own pita bread, you’ll never go back to the pre-packaged supermarket versions and he’s not wrong.

I read through the recipe and planned out my own version, which I then adjusted slightly as I went along. These turned out to be one of the easiest things I’ve ever made and the end result was a batch of enormous, gloriously soft pita breads with the slightest hint of sour from the sourdough. I think going forward I will reduce the size of the pitas to about 80g each to make them a more manageable size, and I will be making these going forward, in fact this might be a weekly bake from now on!

I heated my oven up to as hot as it will go, which was 230C fan, but I think anything over 200C would be fine. My pitas took about 4 minutes to puff up and I couldn’t tear myself away from the oven door as watching them puff up was weirdly enchanting. I felt proud every time I pulled them out of the oven all puffed up and looking very impressive. It almost makes up for my struggles with oven spring on my proper sourdough loaves. Almost.

Sourdough Pita Breads

Makes about 8 pita breads.
Based on Dan Lepard’s Perfect Plain Pitas recipe.

Ingredients

130g leaven
200g warm water
2 tbsp sunflower oil
260g strong white flower
165g plain flour
1 tbsp caster sugar
1 tsp salt

Whisk together the leaven, warm water & oil in a large bowl. In another bowl mix together the two flours, sugar and salt. Add the flour to the leaven mixture to make a soft dough. Cover & leave for 10 mins. Stretch the dough in the bowl, following Azelia’s method, and leave for 2 hours at room temperature, covered with a clean tea towel.

Sourdough-Pita-01

Heat the oven to 230C fan with a baking tray on the centre shelf. Lightly flour the work surface, divide the dough into 100g balls and leave for 20 minutes. Roll out all 8 balls to about 5 mm thick. Once you’ve reached the last ball go back to the first and second and roll them out again with lots of pressure to get it nice and thin.

Take the baking tray out of the oven, quickly closing the door, place the two pitas on the tray and put it back in the oven. Bake for 3-5 minutes until they’ve puffed up and are lightly coloured. Remove from the oven, opening the door for as short a time as possible, and transfer to cool on a rack. Place the baking tray back in the oven while you roll out the next two pitas and repeat until all the pitas have been baked.

Sourdough-Pita-02

Sourdough-Pita-03

Don’t forget to check out the other Sourdourgh Surprises flatbread posts. I know I will be.

Sourdough Loaf : Attempt 4

Ok so I got tired of all the failures & decided that I’d give this loaf a helping hand. I added about 3/4 tsp of dry yeast to help the sourdough along. I had a really good feeling about this try. The dough felt good & springy as I stretched & folded it and it was rising well in between. But I just can’t get the final proof right.

It was 2.20pm by the time I’d stretched it, folded it, rested it & shaped it, so I left it all afternoon, checking every couple of hours. At 10.20pm it hadn’t risen quite enough, but I was worried that by the next morning it would have collapsed so I baked them hoping for some oven spring. I don’t understand what I’ve done to upset my oven but I’ve lost the ability to get a final rise in the oven. They just don’t grow at all in the oven and as you can see the slash just stays as it was cut. So when I pulled these out of the oven last night I thought they were a disaster like the last lot. I went off to bed, despondent.

Sourdough-Loaf-04-01

But I was pleasantly surprised when I got up this morning. Ok, the rise wasn’t good enough and the crust had gone a bit soft from underbaking but the crumb was light and even and the flavour was lightly sour and delicious. It was a good loaf! So while progress may be slow, I am making progress. Despondency be gone!

Sourdough-Loaf-04-02

Now I just need to crack this proofing business. With or without the helping hand of some packet yeast!

Scandi Banana Bread

I treated myself to Scandilicious Baking by Signe Johansen last autumn but I’ve only baked a couple of things from it so far. Having sent that I’ve learnt things just from those couple of uses. Like the delight of using spelt flour in cakes… delicious indeed.

We get our fruit and veg delivered every week from Abel & Cole which means that sometimes we get the same thing in consecutive weeks we end up with a stash that we need to use up, and that usually means that I need to find something to bake with them. Luckily, bananas are easy. This time I tried Signe’s banana bread.

Scandi-Banana-Bread-01

Scandi-Banana-Bread-02

It’s a super easy recipe where pretty much everything is combined in one go, using wholemeal flour, spelt flour & oats to create a really thick, comforting quick bread. Not too sweet (I’d add more syrup if you’re looking for more of a cake) it was perfect with a little butter. We demolished the first half of the loaf in about 15 mins and then forgot about it. A week later I retrieved it from the tin and aside from being a touch stale round the edges it was still delicious. It just needed a slightly thicker smear of butter. No complaints here.

Scandi-Banana-Bread-03 Scandi-Banana-Bread-04 Scandi-Banana-Bread-05 Scandi-Banana-Bread-06

Sourdough Loaf : Disastrous Attempts 2 & 3

The Boy & I decided that we would paint our flat this January. I have some days off to use before April so can comfortably take a few long weekends to get it done. A couple of weeks ago we took a long weekend to paint our bedroom and, never one to turn down the opportunity that being at home presents, I decided I’d bake some bread at the same time. Clearly this was the perfect time to crack this sourdough malarkey. Clearly not.

Sourdough-Loaf-Disaster-01-01

Sourdough-Loaf-Disaster-01-02

Sourdough-Loaf-Disaster-01-03

The first attempt on the Friday went really well. The loaf was rising nicely, even if it was spreading too much, and I left it overnight in the airing cupboard as it was so cold for it to finish it’s rise. What I didn’t think about was that I’d left cling-film over the top to protect it from any airing cupboard dust. The cling-film stuck to it, big time, and as I removed it the next day it ripped the top half of the loaf off. I baked it, but it was totally pointless, it came out like a pancake. I was so frustrated I didn’t even take a photo.

But, I soldiered on. It was only Saturday so I could have another go to bake on Sunday. The dough wasn’t quite as good, but I put it back in the airing cupboard to rise, and over proofed it. You can see in the photo that it’s risen & collapsed. It also had a hard skin on the outside which was hiding a huge air bubble underneath. I baked it anyway, because I wanted to see what happened. I then over baked it. It obviously wasn’t my weekend. It was awful but we ate one loaf, like breadsticks. Waste not want not.

Sourdough-Loaf-Disaster-01-04

Sourdough-Loaf-Disaster-01-05

I’m in two minds whether to keep trying or to wait for my Sourdough Course at the E5 Bakery. But that’s in May. And let’s be honest, it’s no guarantee that I will be able to replicate at home…